
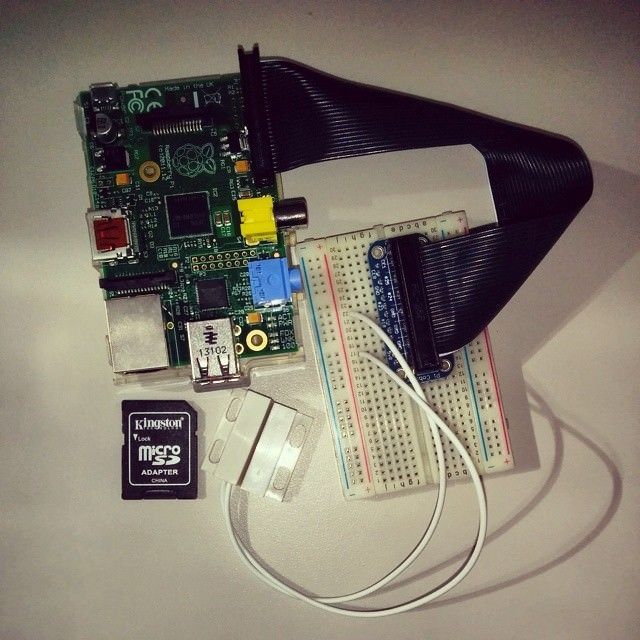
Poo.pi Project Code

Coding for the Raspberry Pi has been surprisingly simple. (I say that now, as I worked for several hours not making much progress until the very end) I wasn't expecting to be able to get the code out in a day. Today I will show how you can interact with the raspberry pi GPIO using python. Next I will show how to use Expressjs and Socket.io to set up the real-time website as the bathroom stall door changes state.
Folder structure:
poo.pi
|- html
  |- index.html
|- js
  |- view.js
|- style
  |- style.css
|- index.js
|- package.json
|- poo.py
Python
This portion of code is what communicates between the hardware and Nodejs. With debugging the Python script, the only way I have found is to run it on the raspberry pi and check to see if it is working as intended. Tests should help you know that it is returning the right results functionally but as for actual operation you will need to run it on the pi itself.
With RPi.GPIO I was having a lot of problems with trying to use this package. There are multiple ways to installing it, you can download it, uncompressed it and then move it to the appropriate python packages location or install it using apt-get.
File: poo.py
The python script is pretty simple and there isn't much to it. All the python script needs to do is host a socket and send the status of the GPIO information. So here are the packages we will be needing:
import time
import socket
import RPi.GPIO as io
io.setmode(io.BCM)
Next we need to define what pins we are going to use. I also have a variable to save what the state was last. This will help later on.
door_pin = 23
last_status = False
Along with the variable declarations, I also add the socket information. This is so that it will immediately open a socket as soon as the script is ran.
s = socket.socket(socket.AF_INET, socket.SOCK_STREAM)
s.bind(('localhost', 8000))
s.listen(5)
I set up the io.variable to listen on certain events based on the pin I specified above.
io.setup(door_pin, io.IN, pull_up_down=io.PUD_UP)
Last of the variables, I immediately accept any incoming connections.
(client, address) = s.accept()
Here is the logic for checking to see if the door is open or closed. It is in a while true loop because I never want to stop checking if the door is closed unless something has broken. Depending on the state of the pin, I will print open or closed. I then check to see if it is in the same state as it was before. If the state has changed, then it encodes false/true and sends it across the wire.
Please note that the Python GPIO package says it is currently unstable and should not be used for real time applications. They said it cannot determine when the RPi garbage collection is used, which can mess it up.
while True:
  if io.input(door_pin):
    print("Closed")
    if last_status:
      client.send(bytes("false").encode('UTF-8')) # We must encode it so that we are able to send it to the Nodejs client.
      last_status = False
  else:
    print("Open")
    if not last_status:
      client.send(bytes("true").encode('UTF-8'))
      last_status = True
  time.sleep(0.5) # This may be adjusted to a longer time since it may not be necessary to have the "real time" updates on the door closing
Node js
Nodejs is what will be hosting your local website and forwarding the status of the hardware to your clients.
Before proceeding onto these next steps, please check to make sure you have node/npm installed. You can simply check by doing node -v && npm -v. If you get two version numbers we are good to go! Next we will need to install Expressjs, its logging counterpart (Morgan) and Scoket.io using the NPM.
npm install express --save-dev
npm install morgan --save-dev
npm install socket.io --save-dev
Server
File: index.js
Variables! Here are the basic components of hosting Expressjs with Morgan and Socket.io.
var express = require('express'),
    app = express(),
    http = require('http').Server(app),
    io = require('socket.io')(http),
    path = require('path'),
    morgan = require('morgan')
    port = 8080;
Next we need to define some variables for the socket handler. We will need to define net which is a package native to Node.js.
var net = require('net'),
    socketHost = '127.0.0.1',
    socketPort = 8000,
    socket = new net.Socket();
If you want any of your static files to be served such as CSS or HTML; then you will want to specify some of these settings. (This may change if you didn't follow the folder structure above) Morgan also needs to be specified here if we want any useful debugging information.
app.use(morgan());
app.use(express.static(path.join(__dirname, 'html')));
app.use(express.static(path.join(__dirname, 'style')));
app.use(express.static(path.join(__dirname, 'js')));
Here I have told the net package to connect to the python socket.
socket.connect(socketPort, socketHost);
Setting up the basic socket.io events I have specified that on a connection to listen to the python socket. If there is data, parse it and then update the view.
Response.toString('utf8') is needed otherwise you get a bunch of byte data.
io.on('connection', function(socket){
  socket.on('data', function(response){
    var status = response.toString('utf8');
    var closed = status.toLowerCase() == 'true';
    socket.emit('statusUpdate', closed);
  });
});
Very last I open the http server to listen on the specified port, and to log the connection info to console.
http.listen(port, "localhost", function(){
  console.log("Listening on *:" + port);
});
Client
File: js/view.js
The client logic is about as simple as the python logic. All we need to-do is update a few divs and wahla! The user will forever be updated.
Socket.io automatically sends its js file, so we don't need to do anything special other than invoking its initializer. I also have a few selectors for the status, which will be added below.
var socket = io(),
    $status = $('#status'),
    $statusMsg = $('#status-msg');
From here, I check to see if the server side of socket.io has sent an event. If it has, I check to see what the status is and if I need to change anything on the view. This needs some improvement.
  socket.on('statusUpdate', function(open){
    if ( !open ){
      $statusMsg.html("Closed");
      $status.addClass('not-avail');
      $status.removeClass('avail');
    }else{
      $statusMsg.html("Open");
      $status.addClass('avail');
      $status.removeClass('not-avail');
    }
  });
HTML
The html portion of this project is pretty straightforward. There isn't much other than importing what is needed
File: html/index.html
I have some very basic HTML markup here. If there are any questions please post them below. As a side note: The reason why I put the majority of my scripts at the end of the <body> tag is because your initial site content will load faster. Other js files will load after the basic DOM has loaded. This can solve many errors. I also like how it keeps the markup looking clean with your styles at top and JS files at bottom.
<html>
  <head>
    <title>Can I Poopi?</title>
    <link rel="stylesheet" type="text/css" href="style.css" />
  </head>
  <body>
    <div id="status" class="status avail">
      <div class="status-container">
        <span id="status-msg"></span>
      </div>
    </div>
    <script src="//ajax.googleapis.com/ajax/libs/jquery/1.11.1/jquery.min.js"></script>
    <script src="socket.io/socket.io.js"></script>
    <script type="text/javascript" src="view.js"></script>
  </body>
</html>
Style
File: style/style.css
I don't feel like this really needs much explaining, if there are any questions please comment below.
body{
  margin: 0;
}
.status{
  position: relative;
  left: 0;
  width: 100%;
  height: 100%;
}
.status-container{
  margin: auto;
  width: 150px;
}
.status span{
  display: table-cell;
  vertical-align: middle;
  height: inherit;
}
.avail{
  background: green;
}
.not-avail{
  background: red;
}
Now What??
Well... This project is still a work in progress. I am still working on getting queues and sessions into the app. I eventually want to add the ability to have achievements of some kind. I think it would add some office fun and humor to the atmosphere.
As for running the scripts this is what I am doing:
- I use screen for my session management. You can get screen with:
sudo apt-get install screen - Next create a new session by:
screen -S python - Navigate to your poo.py file and type:
python poo.py - CTRL + D to disconnect from the session.
- Create a new session except this time name it
nodeorexpress - Navigate to where index.js is stored and type:
npm index.js
- I like to use
starta node package that can run your index files.npm install start -g - Some configuring may be needed if this command doesn't work:
npm start
If you need to reconnect to a session: screen -x screenName
I hope this was informative, it is a little longer than some of my posts, but I believe I have covered everything that I have started on. There is more work to be done, and I will post more as I get future in my development. As for now, I have some of the resources I used linked below. If you really liked this post, please share it!
Poop.pi Project Server Scripts Coming Soon!
Resources:
GPIO information:
http://www.raspberrypi.org/documentation/usage/gpio/
installing GPIO Python Package:
http://www.raspberrypi.org/documentation/linux/software/python.mdsudo apt-get install python3-rpi.gpio
String convert:
http://stackoverflow.com/questions/12121775/convert-buffer-to-utf8-string
EXPRESS INSTALL MORGAN:
https://github.com/expressjs/morgan
SOCKETS:
http://pymotw.com/2/socket/tcp.html
http://www.hacksparrow.com/tcp-socket-programming-in-node-js.html
SOCKET IO
https://github.com/rizowski/nodejs/blob/chat/html/index.html
HARDWARE:
https://learn.adafruit.com/adafruits-raspberry-pi-lesson-12-sensing-movement/parts